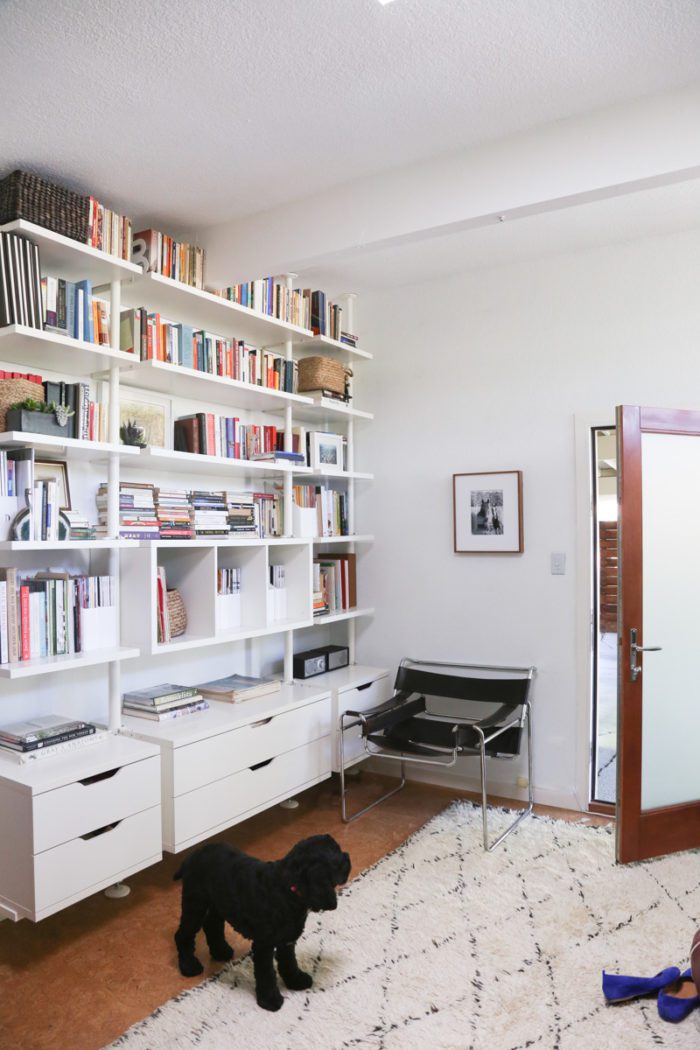
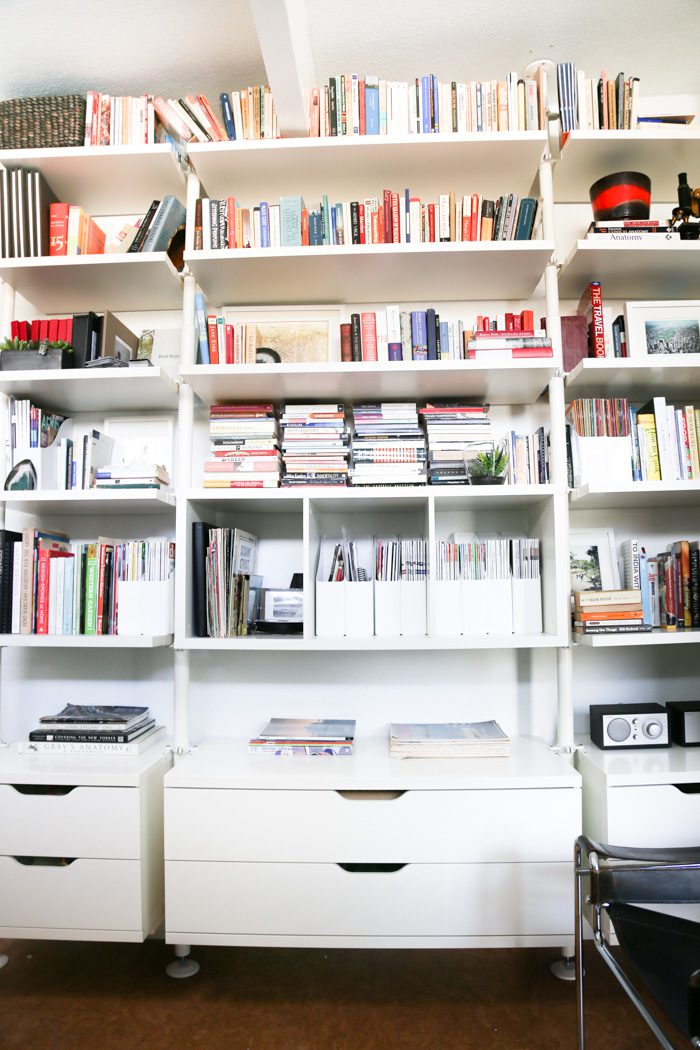

When we first moved into our home, I talked about my fondness for the Dieter Rams’ Universal Shelving, sold by Vitsœ. And we came quite close to calling the company to get started. You might recall that I said they made a great case for starting small with the “starts-cheap-but-gets-exorbitant-quickly modular system.” They really did. But I still couldn’t do it. The shelves and E-track were reasonable, but the drawers (which I really wanted) started in the $800-1000 range (each).
Lo-and-behold, Ikea came through again. Their STOLMEN closet system bore some striking resemblances. The only issue: the shelving system is designed as a closet system, so everything is centered along long axis poles that you fix to the ceiling or wall, to allow for hangers extending out on both sides. However, if you’re hoping to store books on the shelves, you want those shelves to back up flush to the wall to keep things from falling backward into a large gap. If all of your shelves are the same width, no problem. If you want to include deeper drawer units, here’s how you might avoid this…
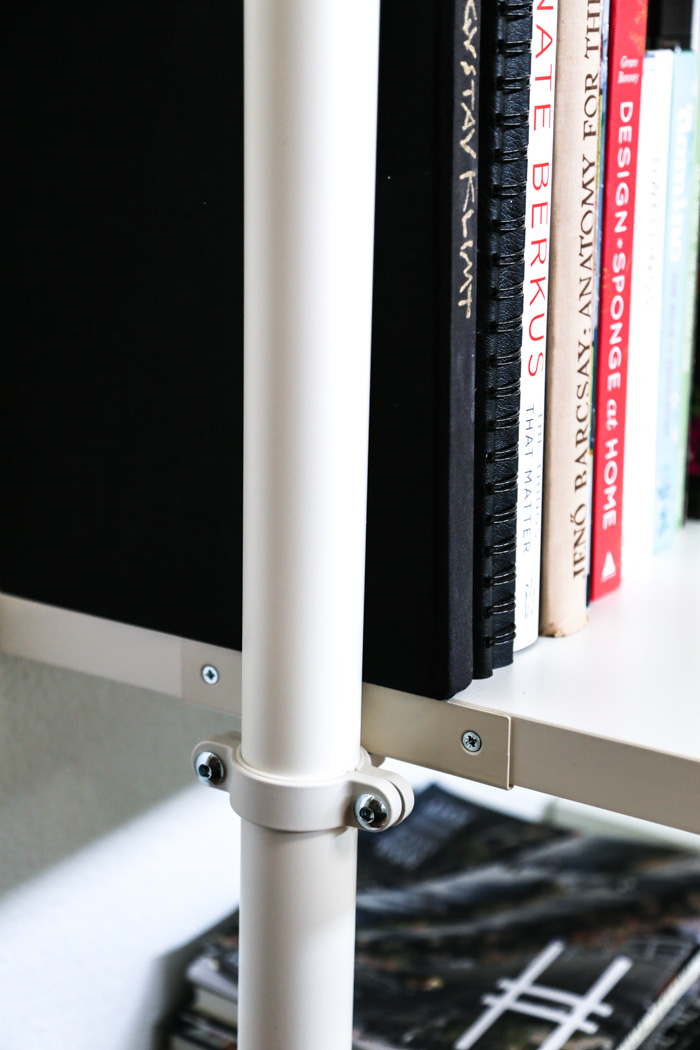
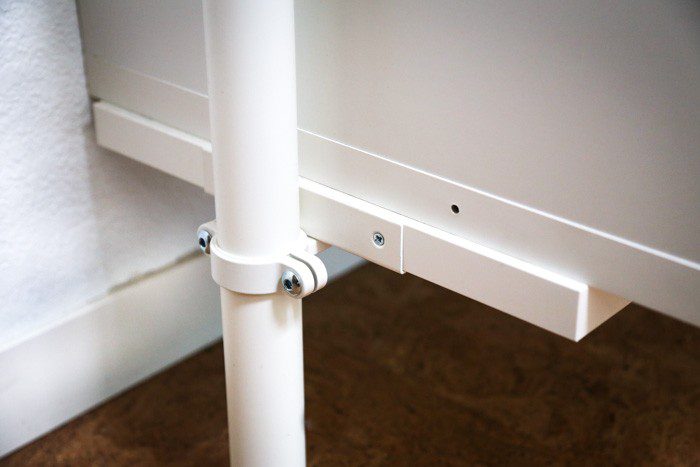
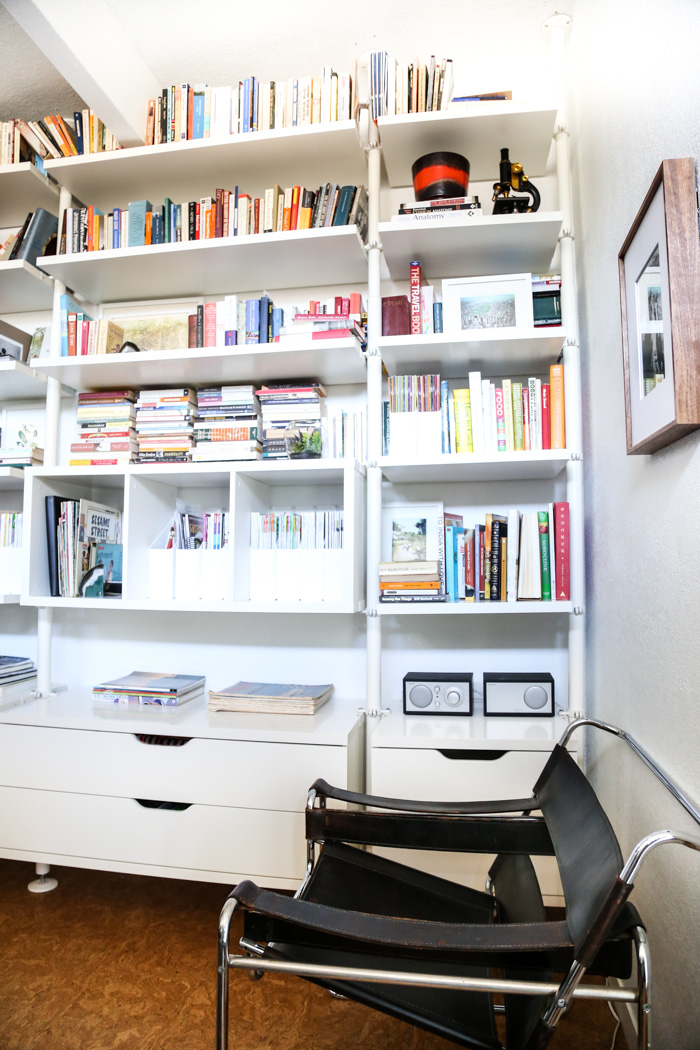
You can’t simply slide the drawers forward so that they’re flush with the wall as they’re too heavy and would tip forward. But you can buy an extra set of shelves to place beneath them. In other words, if one were to replicate this arrangement, purchase three extra 15-inch depth shelves to place beneath the drawers (as shown above). Next:
- Position the axis poles such that all of the shelves (we chose, uniformly, 15-inch depth) are aligned to be flush with the wall. (Our ceiling is arched, so this—and getting the poles vertically level—was actually the hardest part. In fact, I’d wager it always is, arched ceilings or not.)
- Once your poles are in place, follow the standard instructions to install all of the shelves you want with the rings/brackets. Additionally, install the extra shelves at the base of where you’d like the drawer units to sit.
- One at a time, place your drawer units on top of the shelf and slide it back to be flush against the wall as well. Use the ring/bracket to mark where the bracket’s screw holes should fall. (There are two pre-drilled holes, but you’ll need to make new ones).
- Remove the drawer unit and drill your new holes where appropriate.
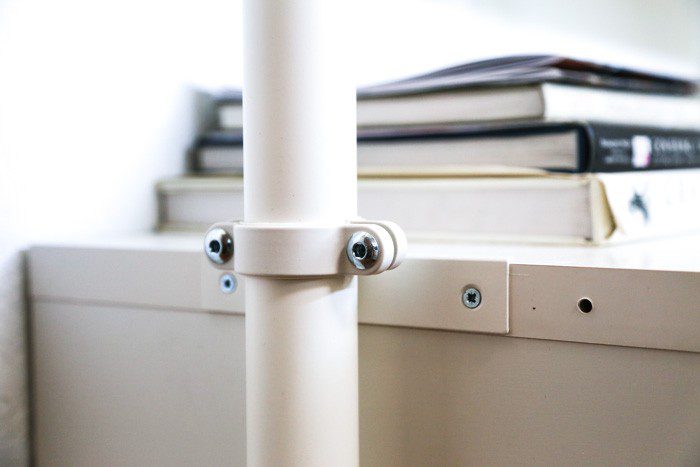
You can then slide the drawer units back onto the bottom shelf, position them flush, and attach them to the axis poles as you did the rest of the shelves or components you chose. The extra (pre-drilled) holes will remain visible (as shown above), but you could also look into a putty/paint solution, or even white stickers, if this really bothers you. We’ve left ours for the time-being.
It’s a really versatile system, and I’m so happy with how they turned out. The drawer units have a nice, solid feeling when you open or close them. The extendable poles work well with our arched ceiling. And it all ended up costing about a tenth of what I’d previously priced for an entire wall of the more aspirational Vitsœ.
P.S. More home inspiration: small-space living, wallpapers for kids, the search for a perfect dining table, and another quick Ikea Hack. Also, on Pinterest.






















21 Comments