
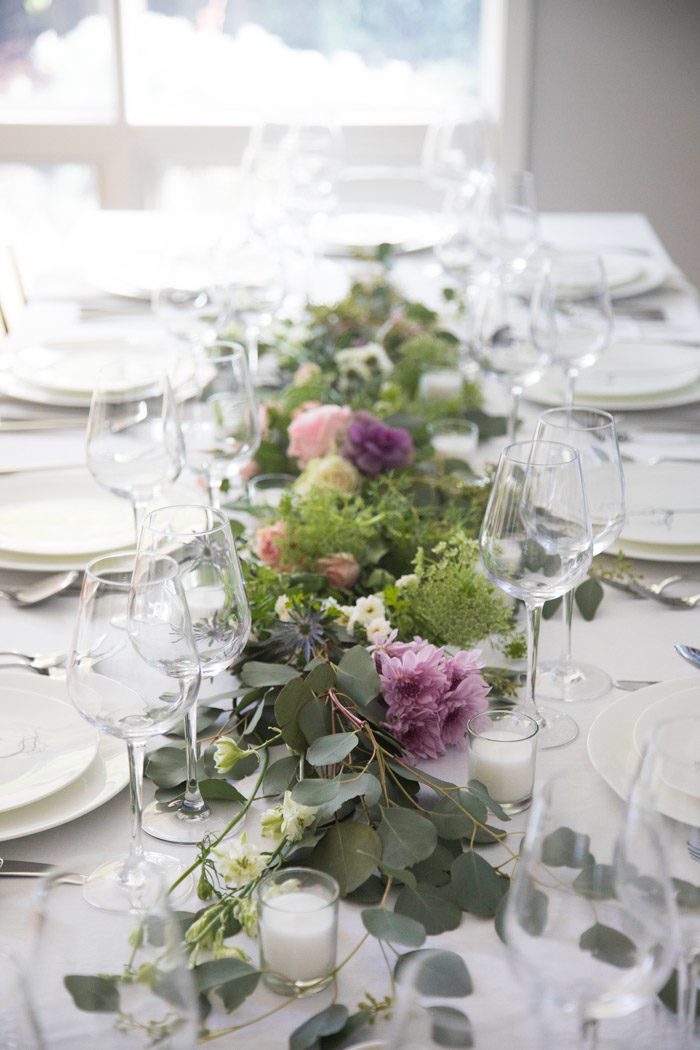
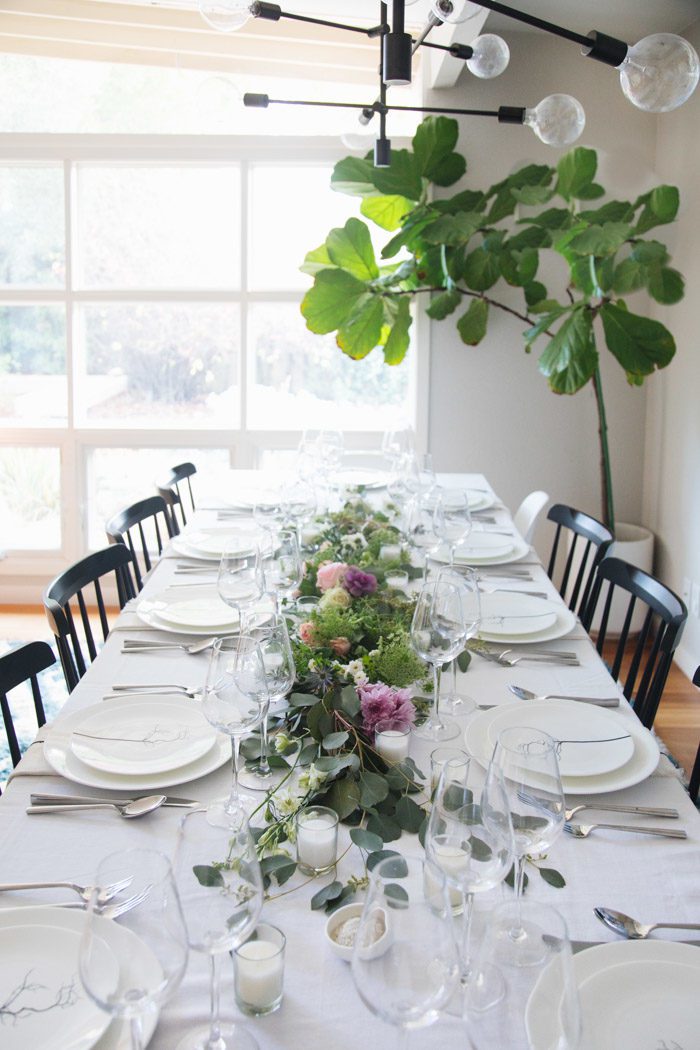
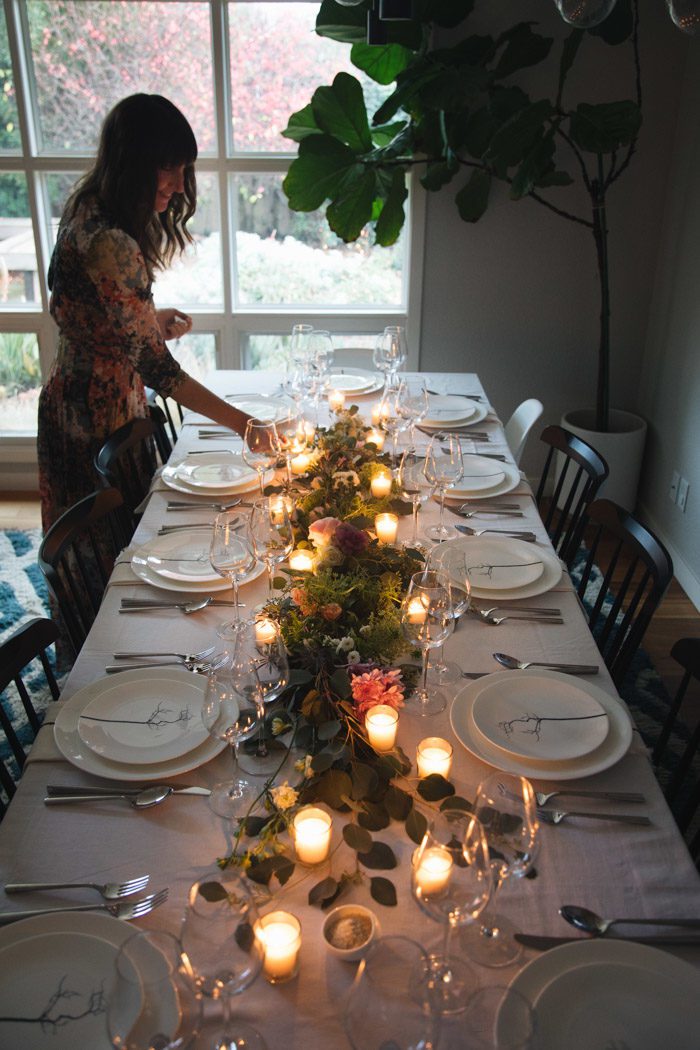
There’s something very romantic about letting flowers and greenery just spread out along a table filled with wine and candles—and hours-long dinner conversation. Last fall, along with friends, we’d joined a bid on a chef-catered dinner at home to benefit Davis Farm-to-School programs, and so all there was left for us to do was set the table!
A garland seemed like the perfect way to make things feel special, while keeping the centerpiece low enough that everyone could look across and talk to each other. Plus, it’s surprisingly easy to assemble.
Here’s how to make one…
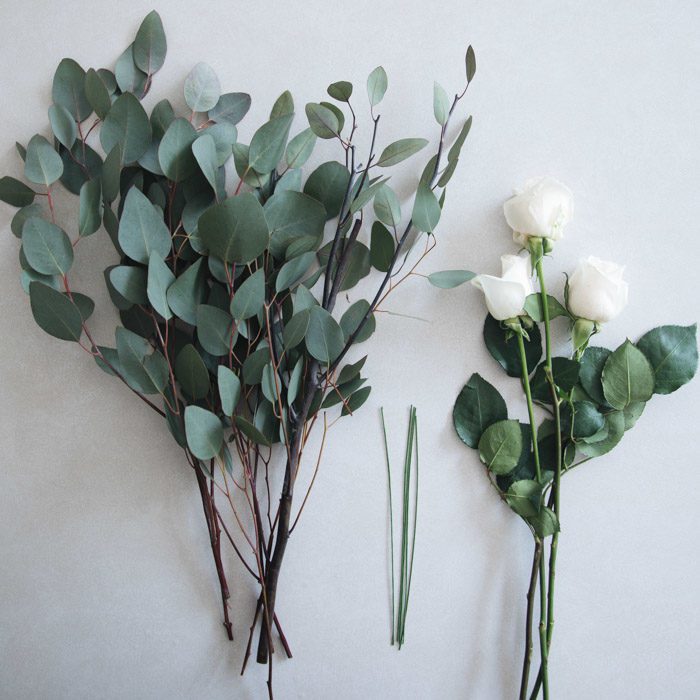
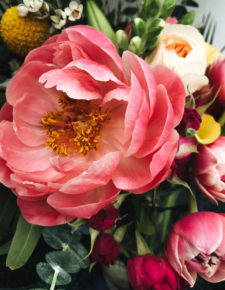
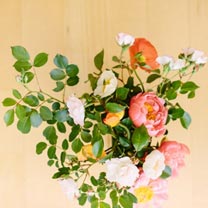
I picked up some silver dollar eucalyptus and some seeded eucalyptus, along with an assortment of pretty stems—like roses, Queen Anne’s lace, and Sea Holly—from a local florist. You can also ask the floral department at your local grocery or check the bins at Trader Joe’s. The best way to bind them is using something called “paddle wire,”which is spooled and will let you wrap as you go for longer garlands. I wasn’t sure where I’d left mine, so the florist gave me some pre-cut wires.
For a full look, use at least one bouquet-sized bunch of greenery for every foot of garland you’d like to make. However, because I would be filling mine with a lot of flowers, I was able to use slightly less.
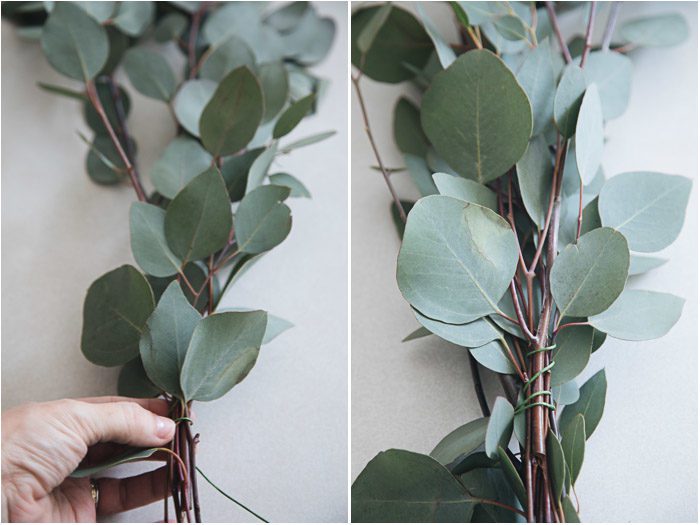
The idea is that you want to lay branches atop one another to the fullness you desire and wrap wire around the overlain stems.
Start by laying two large branches in the center of the table, as far apart as you’d like them to reach, with the stems facing each other, and then just set down the other branches to fill it in. This will give you a sense of how much overlap you need to reach your desired length. (You can also do this by measuring, if you’re making something to transport elsewhere.)
Then, starting from one side, pick up a few of the branches and begin binding them: lay one branch atop another, wrap, repeat. Wrap the wire where your fingers are naturally resting to keep the stems together and then just keep the paddle of wire spooling out. Keep adding branches to get the fullness (width) you desire and wrap as you go. You can go back with your pruning shears later and trim any errant stems, so you don’t even have to worry too much about the shape being perfect.
The photo on the right shows the wire as it appears on the underside. From the top, the wire is hidden under the leaves.

Flip it over and make sure it’s sitting flat on your table the way you want.
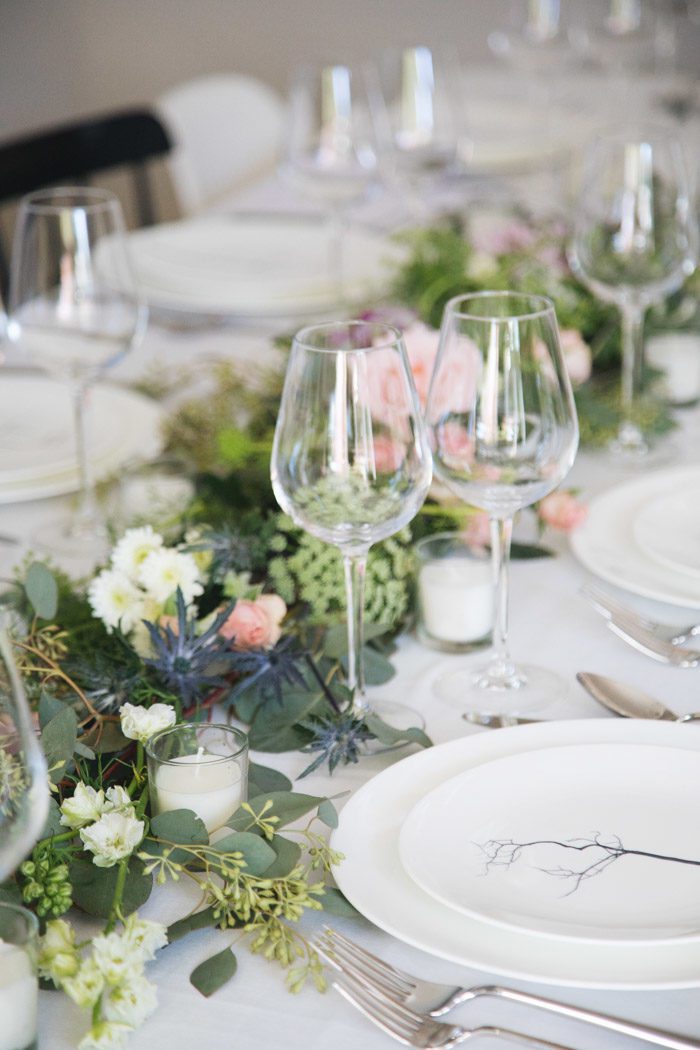
And then just tuck in the flowers, stepping back now and then to check the balance. If you’re making this ahead of time to bring somewhere else, you will need to actually wrap the flowers with wire at the stems, but I’d recommend just tucking if you can—especially so that you can keep the stems in water as long as you can.
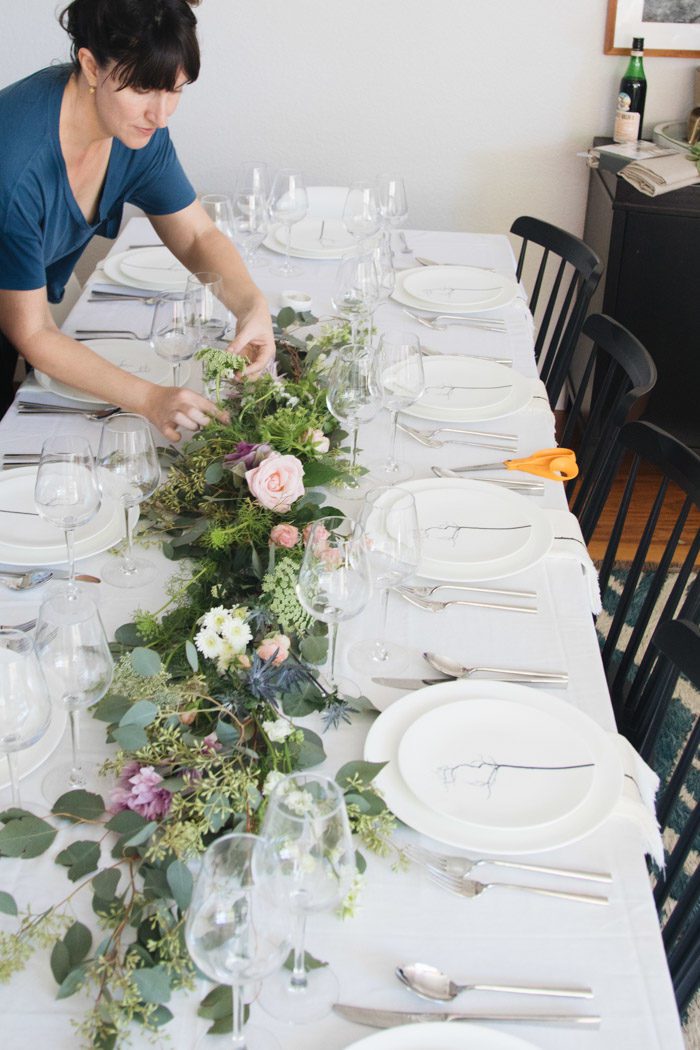
In other words, while I made the garland base in the morning, I built it out with flowers just a few hours before guests arrived, to keep the greenery fresh.
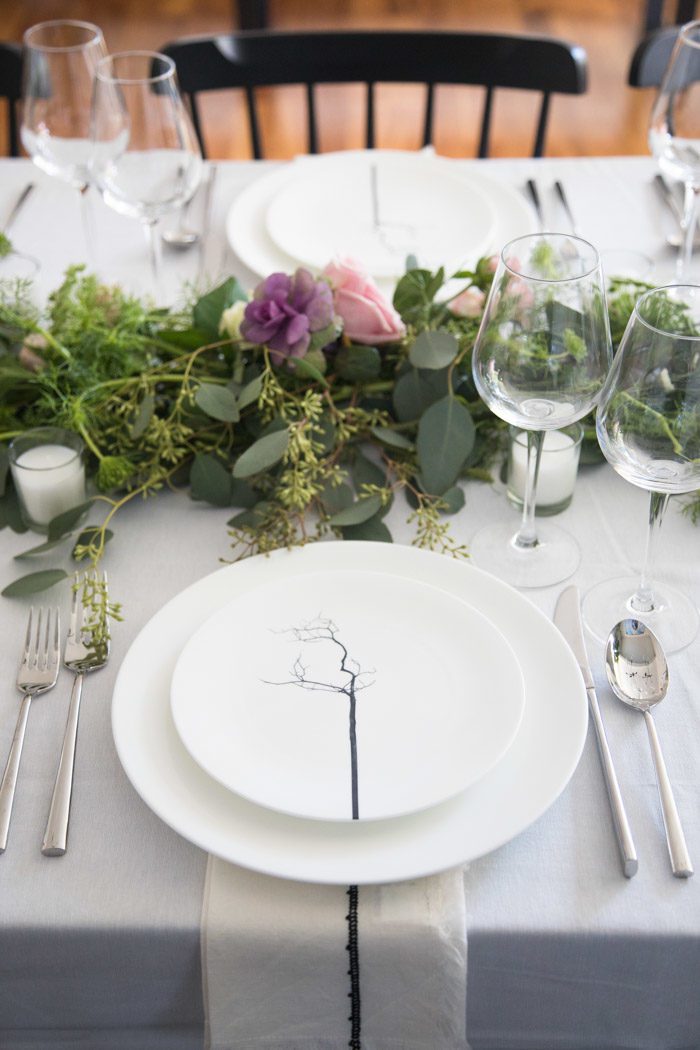
Keep in mind that you’ll need room to add place settings, so the width of your garland shouldn’t take up more than a third of the table’s width.
Finally, I tucked some candles around the garland. Be sure to use caution and think about where the flame will be as the candles burn. Those in a glass container are safest.
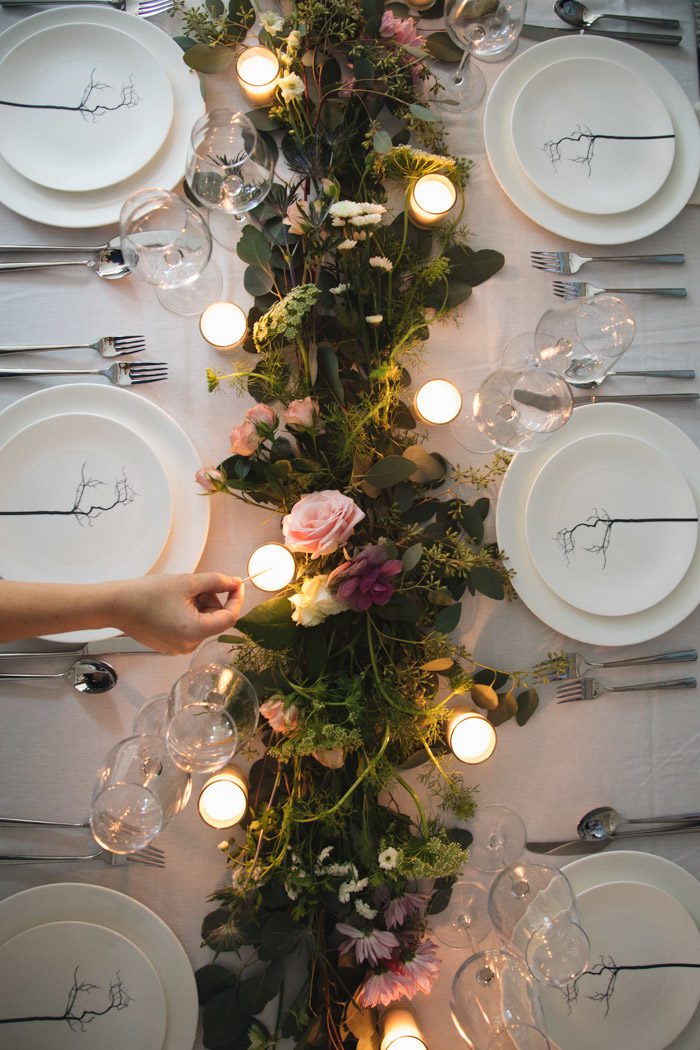

It’s really surprisingly simple to assemble, and I love how it turned out.
You can do this with lots of kinds of greenery—here’s a tutorial using olive branches. This would also be the first step toward making a wreath—just wrap the garland around a wreath form.
P.S. Natalie Bowen’s tips for sourcing flowers and for arranging them. And a tour of a rose farm with tips for keeping grocery bouquets alive.


5 Comments