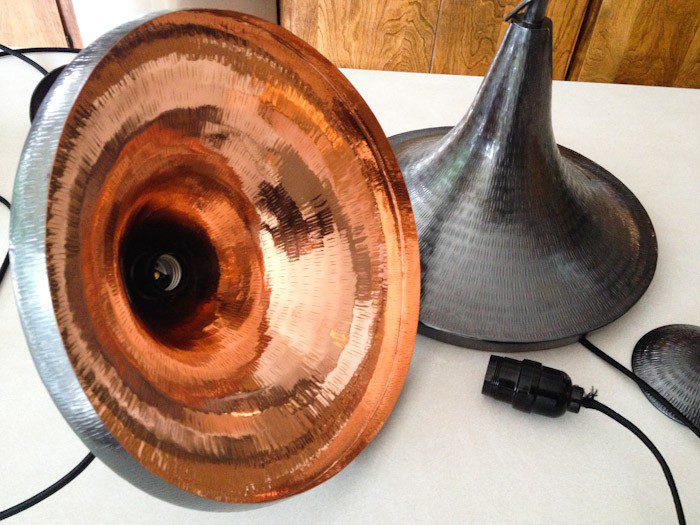
We actually brought back a lot of furnishings from Bali–so sharing finds from there may become a recurring theme–but one of the first things we did upon moving into our new home was to install the copper light fixtures that we hand-carried back in our suitcases into our kitchen.
It was the first of the many home projects we’ve started tackling that seemed like it should be so simple–but wasn’t at all. And I wish I could tell you that we resolved it with DIY skills, but we brought in an electrician (or two).
First, we needed to rewire the lights to attach cords that could be used to hang the lights (the lights had been wired alongside chain). We fitted new sockets and then ordered attractive fabric-wrapped black cord. And then threw it out when it couldn’t be used to bear weight.
Then we had an electrician come in to install lightboxes or transformers where the lights would be hung. The previous fixture (shown on move-in day) had a single lightbox, with wire running along the ceiling. Many holes were drilled. And then they drilled some more once we realized that the first three weren’t evenly spaced (argh).
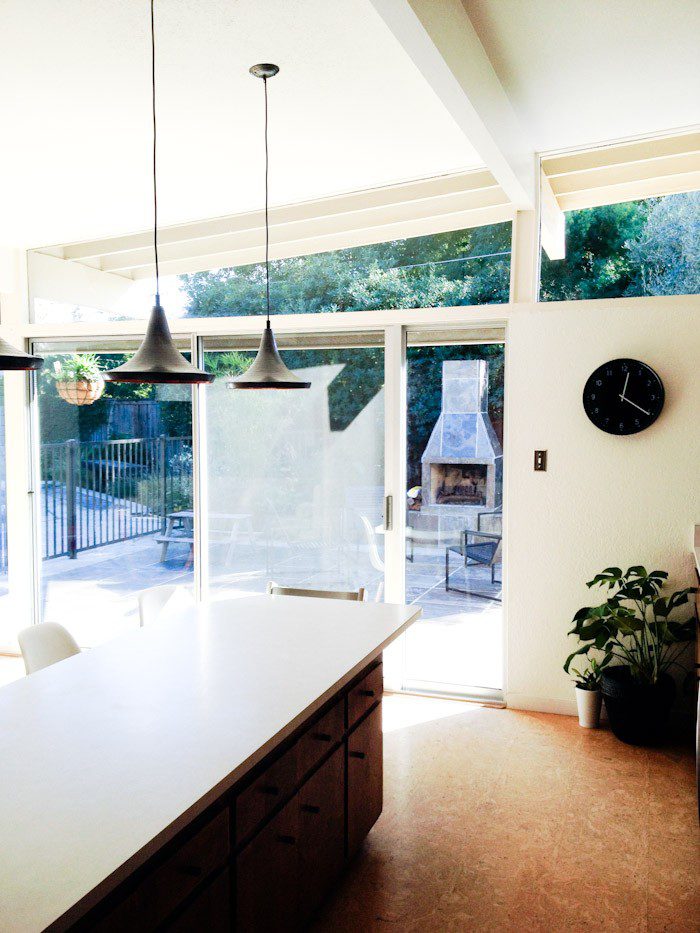
Next, someone came in to re-drywall and cover the holes. Then that had to be textured. And then it had to be painted (but the of course drywall guy doesn’t paint).
And then, finally, Aron made about five trips to various grocery stores to test out different lightbulbs and try and find the best combination of light quality and energy efficiency to pair with the orange-copper. Phew!
So simple, right?
By the way, the rest of the room is still a work in progress. I think we’re currently trying out chair/couch pairing number three or four?
We don’t have a name picked out yet, but this is how Hudson calls to the very sweet 8-week-old Cocker Spaniel who came home with us yesterday. I think they’re going to be fast friends even though they each seem thoroughly exhausted by the presence of the other.
Anytime I read about a foolproof method for cooking eggs, I have to try it out. And this method from Cooks Illustrated, I promise you, proved revolutionary. Tender, but set, warm whites and reliably runny yolks–whether one egg or six–every single time.
All I do is bring a 1/2-inch of water to boil (One-half-inch! As in takes-no-time-at-all) before placing my eggs in the pot, lowering the temperature to medium, and re-covering it. Then I set a timer for 6-1/2 minutes. It turns out that steaming the eggs (placing less water in the pot) actually means there’s less temperature variability owing to the number of cold eggs you introduce, making this recipe work for a simple morning ritual or for serving a crowd.
After time’s up, I place the eggs in cool water to get them cool to the touch. The eggs are easy to peel (easier than hardboiled eggs) because the whites are so springy.
Soft-cooked eggs are delicious on their own, atop pasta with butter and cheese, on pizza… on nearly anything. Right now, my favorite way to eat these is with salt-and-pepper avocado toast: smear toast with a light serving of mayonnaise, cover with at least half a ripe avocado, top it with eggs and give it a healthy dash of freshly ground pepper and sea salt. Then, let the runny yolks do their job.
By the way, the folks in the Cooks Illustrated test kitchen pointed out that you’ll have the best success with eggs having perfectly centered yolks. It doesn’t make a huge difference, but it’s true: if you wanted to be an absolute stickler for an important meal you’re serving you can hold your eggs up to a bright light and select for the ones with centered yolks.
Have a great weekend! Will you try this for breakfast?